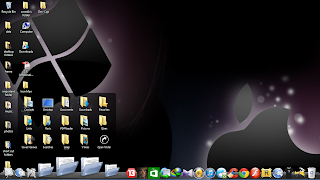
Mac os x dock
I am going to teach you how to get mac os x dock on windows.
This will give you the exact look of mac dock on windows .There some steps that
has to be followed so that you can get the dock also I will show you how to get
some extra features in it .
Let me show you my dock
So the steps are –
1. Go to the following link which
I give you.
2. Now go to Downloads.
3. Now click on Rocket Download
and download it and install it.
4. Then just open it and you will
find your dock.
5. Then click on dock settings.
6. The following settings will
appear[general,Icons,Position,Style,Behavior,About].
7. Choose your position ,
style,etc.
8.Now follow this link
9. Then click on mac os x leopard
skin and download it.
10. Then copy the files and paste
it in rocketdock file which has been created while installing the software
11. Now go to dock settings and
click on styles and then themes and choose mac os x leopard
12. You will get your mac dock
ready .
Now it’s time for some extra
features.
1. Now
go to http://rocketdock.com/addons/docklets/popular
2. download stack docklet and install it.
3. Copy
the file and open rocket dock file and paste it in docklets.
4. Come
back to desktop and open dock settings .
5. Right
click on the dock and select add item.
6. Choose
stack docklet and an icon will appear.
7. Right
click on the icon and click on icon settings.
8. Choose
the file you want that should open by browsing.
9. Now
browse for icons and select an icon that you want should be displayed.
10. Now
it is optional for you whether you want fan style or a grid style by choosing
it in mode settings.
11. Let
me show you mine.
12.
13.
14. Or
you can choose automatic.
15. Then
click ok.

.png)
.png)
No comments:
Post a Comment